Connect an existing Noulek license
Objective
Connect this WordPress site to Noulek Cloud with a license key you already have, without using the Start with Free onboarding flow.
Before you start
- You need a valid Noulek license key from your account or purchase.
- You need WordPress admin access to Noulek AI → Settings.
For first-time activation including Start with Free, see How to activate Noulek.
Procedure
1. Open License settings
Go to Noulek AI → Settings and open the License tab.
2. Find Connect existing license
Scroll to the Connect existing license card. The description reads: Already have a Noulek license? Enter your license key to connect this site.
If Noulek is already active on this site, the same License key field appears under Change license with Save new license.
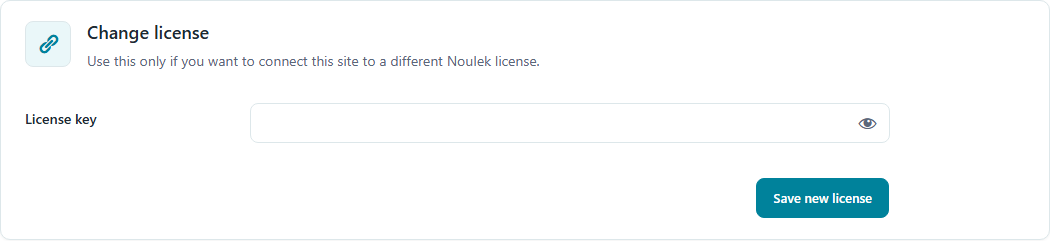
3. Enter your license key
In License key, paste your key. The field is masked like a password. Use the show/hide control if you need to verify what you typed.
If your deployment shows Backend URL (Advanced / Development only), leave it unchanged unless your administrator instructed you to use a custom Noulek API host.
4. Save and refresh
- Click Save connection.
- Click Refresh status to pull the latest plan and site authorization from Noulek Cloud.
5. Confirm connection
After a successful connection, the License screen switches to the Connected to Noulek Cloud view with Status: Active, your Plan, a masked License value, and this site’s URL.
If connection fails, read the notice on the License tab, verify the key, and ensure this site URL matches your Noulek account registration.
Expected result
The site is linked to your existing license. You can configure LLM and Vector DB and use Knowledge Base, Search, and Chat according to your plan.
Next step: Check license status whenever you need to verify plan or refresh authorization.